Greetings fellow Raspberry Pi enthusiasts. I have something pretty cool to share with you today. I've been wanting to use the Raspberry Pi for a media center since I first heard about it. When Newark finally told me I could order the Pi I jumped at it chance and then promptly left town on a family vacation. My nephew Isaiah, who I met up with in Alaska while we were on vacation, discussed the media center project and how to implement it. Upon his suggestion we settled on running VLC. I had assumed we would have to get some webserver up and running and figure out how to slave VLC to our wishes but that is largely built in already. It is called the VLC Web Interface (or VLC http interface). That made this project all the more simple.
Below is the process to install it. This process assumes you have a freshly flashed Raspbian Wheezy (7/15) image that has NEVER BEEN BOOTED BEFORE. This made the most sense for us as we assumed you would plop this guy down somewhere and not use it for anything else.
- Take a freshly flashed Raspbian Wheezy imaged SDCARD and put it in your Rπ
- Make sure your WIFI adapter is NOT plugged in.
- Plug in keyboard
- Plug in Ethernet cable connected to the Internet
- Plug in Rπ
- Raspbian will boot up to the setup screen
- expand_rootfs
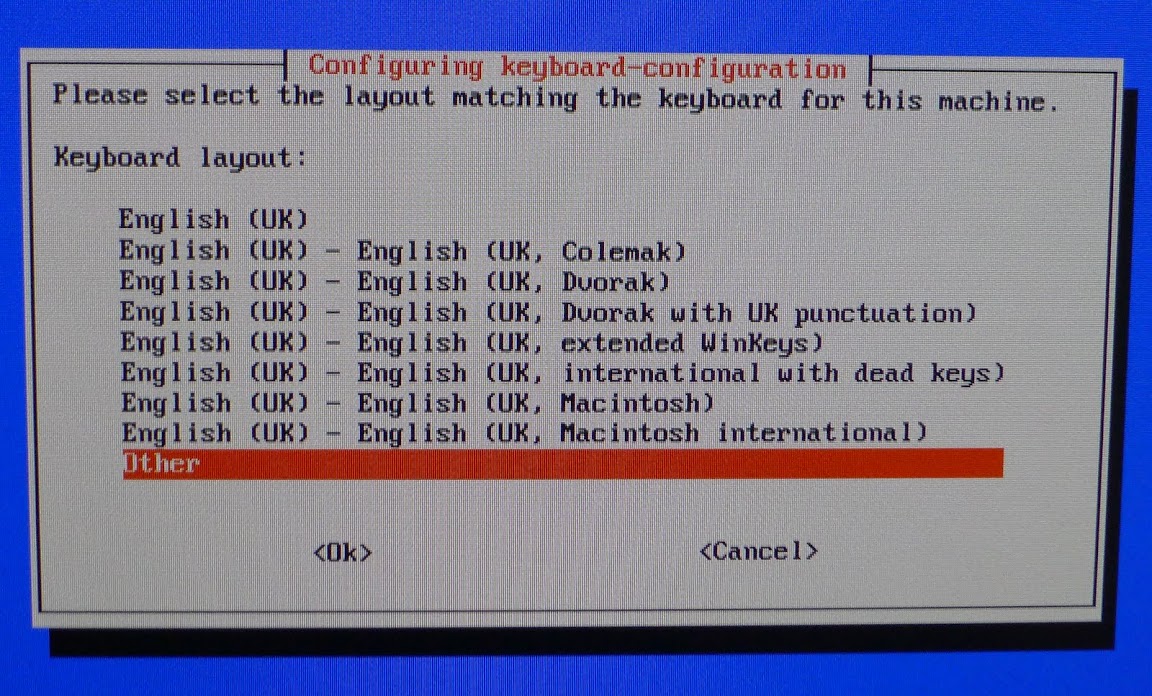
- configure_keyboard
- Select keyboard that works for you (default is UK which is hard to use with a US keyboard) Images of this process are at the bottom of this post (its sort of long and tedious).
- change_locale
- change_timezone
- ssh
- enable SSH Server (not necessary but useful since its headless)
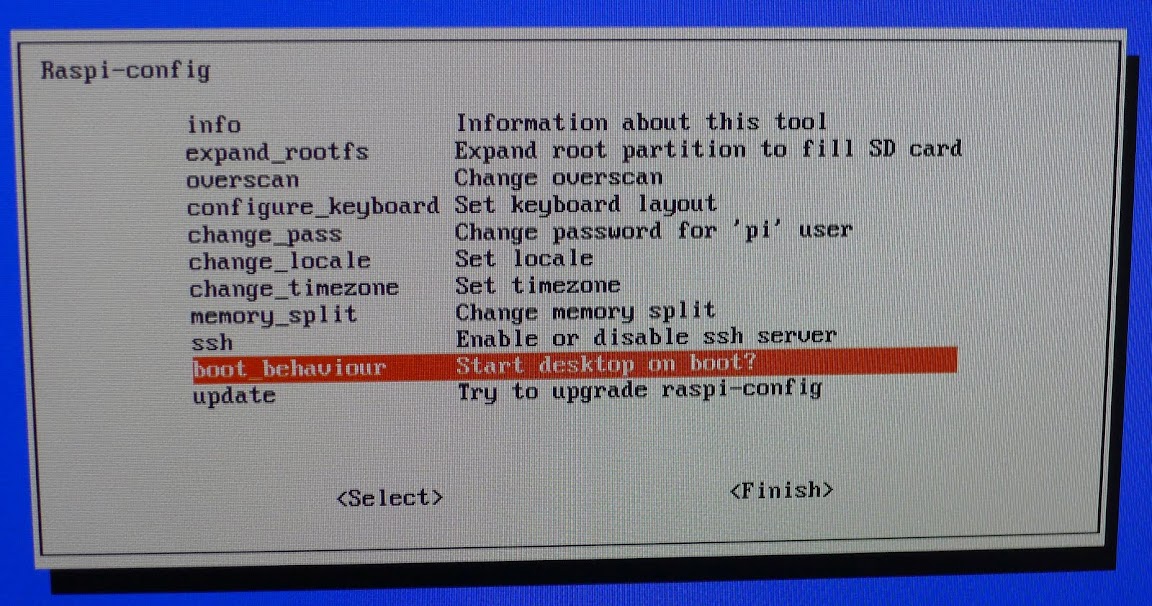
- boot_behavior
- So NO. You want to disable booting to the desktop
- Reboot
- Login as root. Type "root" at the login prompt.
- Enter the commands below. (downloads and executes an installer script written by my nephew)
It will prompt you the following things:wget db.tt/rDy1S8Ga -O install.sh source ./install.sh
I recommend you select 1 if you plan to use the headphone jack.Press zero to set output to auto, press 1 to force headphone jack, press 2 to force HDMI.
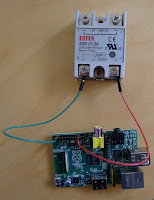
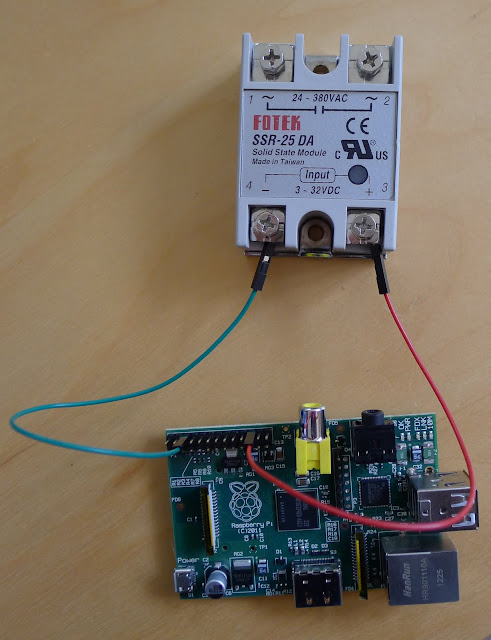
Click Y if you want GPIO25 (pin 22) to go HIGH (3.3V) when VLC is playing. Pin 22 is positive and Pin 6 is GND. The numbering system is strange because it starts at 1. You want the third pins from the top and bottom on the outside. Refer to the photo below. SSR available at Amazon.comWould you like to setup the GPIO relay [y/n]?
This is the driver for the WIFI adapter I selected. Available at Amazon.comWould you like to install rtl8188cus WIFI drivers [y/n]?
This driver installer was acquired from the Rπ forum and used with permission.- At this point the install actually begins. VLC takes a long time to download and install. Then, if you selected the WIFI drivers it will ask you a bunch of VERY IMPORTANT questions and PROMPT YOU WHEN IT IS SAFE TO INSERT YOUR WIFI ADAPTER. Please read and follow along. I found that if it pauses for a long time while it prompts you to wait for the adapter to blink and connect a quick re-plugging in of the adapter gets the system running again. The WIFI driver script ends asking you if you would like to upgrade your entire Rπ. I say no.
- Unplug your ethernet cable (if you are using wifi).
- Reboot.
- Boot up screen will tell you what the new IP address is on Wifi. make a note of it. You can then use this address to talk to your Rπ from local devices on the network. You can setup a static IP if you desire by going to /etc/networks/interfaces and changing the
TOiface wlan0 inet dhcpiface wlan0 inet static address *your ip* netmask 255.255.255.0 gateway *your gateway ip* wpa-ssid "*your SSID*" wpa-psk "*your password*"
The GPIO stuff works by running a script that checks the VLC status stream and turns the pin on or off as necessary. I did this with one long shell command the executes every 300ms. There are no doubt many ways to do this, but I always liked AWK and | so that's how I did it (its below). You can find all scripts we wrote to make this work in the /root folder.
wget -qO- localhost:8080/requests/status.xml | awk '/<state>/ {if (index($0,"playing") > 0 || index($0,"paused") > 0) {print "echo "1" > /sys/class/gpio/gpio25/value"} else {print "echo "0" > /sys/class/gpio/gpio25/value"}}' | bashOne thing I should mention is that depending on your network speed, you may want to increase the buffering cache so you do not get skips during streaming playback. This is done by modifying the /etc/init.d/rc.local. Add the two caching arguments you see below (to the line starting vlc you'll find it in there somewhere)
su - vlc -c "vlc --intf http --daemon --disc-caching=20000 --network-caching=20000
These are some screen shots from the initial config. I found the keyboard part sort of confusing.


Thanks so much for this guide. Worked perfectly! Any idea, though, why .pls files (i.e. the stream from indiepoprocks internet radio station) won't show up when browsing the file system for media? I checked that it is an allowed file type in the internals of the vlc distro that we're using here... And it is. I wonder if it is a limitation with the front end of the interface that you built?
ReplyDeleteoh wait! I figured it out. I needed to edit controlers.js in /usr/share/vlc/lua/http/js according to the commit here: http://git.videolan.org/gitweb.cgi/vlc/vlc-2.0.git/?p=vlc/vlc-2.0.git;a=commitdiff;h=9855165f8168f0db54852d208fd8be8a3e5cffb1;hp=ac7e319910923a63323728ce7ce999a52432c548
ReplyDelete