The Atlanta Cosplay Meetup is a bi-monthly-ish group of cosplayers, prop builders, and costume makers hosted at Freeside Atlanta. We have been meeting since October 2014 to share ideas and projects.
In November we began discussing an idea about making a group costume - something we could all work on, and eventually wear, together - and how we could make that into a reality. After a lot of debate (and a little help for Rachel who had already made her own Xenomorph costume!) we settled on making a Colonial Marines and Xenos group from the Aliens franchise.
We just recently wrapped up our 3rd group build, so let's recap what we've done so far.

Our first build we focused on planning and various ideas of what we wanted to do and how we wanted to get there. We decided to use Pepakura to laser cut cardboard as the rough master for our Marine's armor, and to 3D print some of the detail parts as well as their various weapons.
Pepakura is a program that takes a 3D object and lays it out into 2D faces. The example I like to use for this is creating a a paper craft cube. You can lay out the 6 faces of a cube on a sheet of paper, cut the lines, score and glue tabs, and at the end you have your cube in the real world.
This concept scales up to infinitely complex objects. Cosplayers have been using Pepakura for over 15 years now to create complex suits of armor and props. What I discovered is that Pepakura can export into a format that Freeside's laser cutter can interpret, which turns hours of cutting material into mere minutes.


For our second build, we began laser cutting parts for the Marine torso, starting with the chest. The parts were exported from Pepakura into the laser cutter's software, which was then cut out of cardboard. By dialing in different settings for "cuts" and "scores", we can complete everything in a single job. After about 20 minutes we had all of the pieces cut out and began assembling!
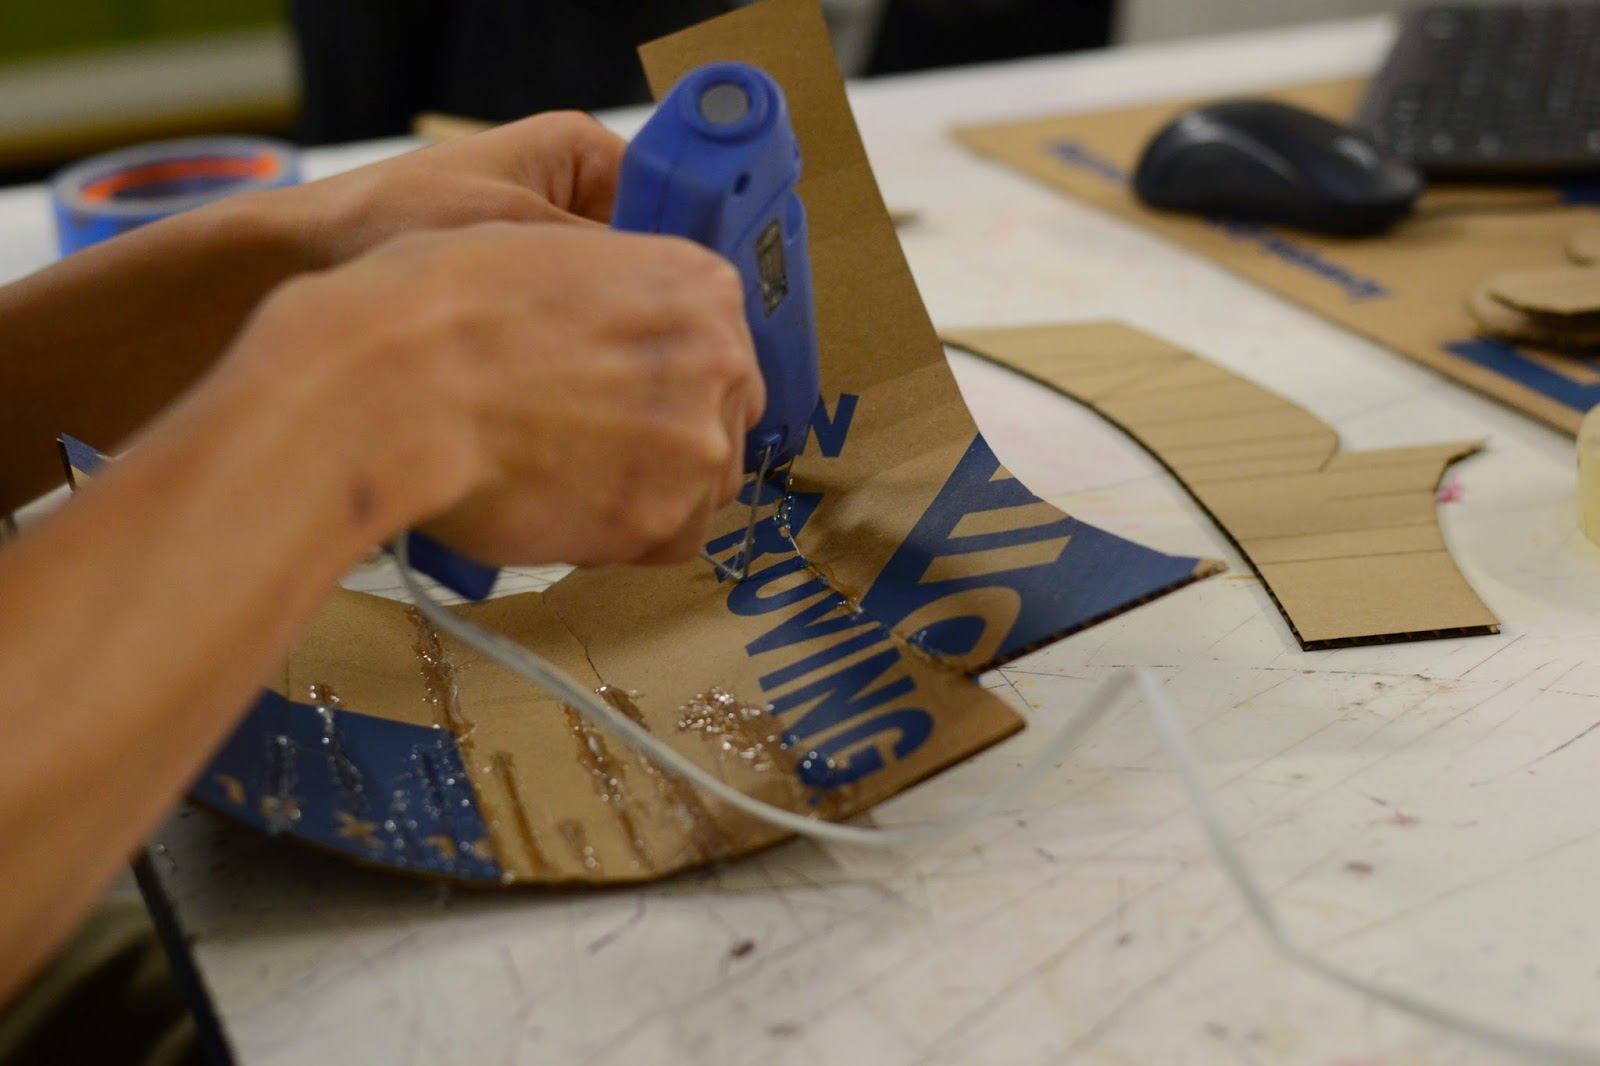
Assembly consists of using hot glue to glue the seams of the cut together. We glue the edges on the inside of the cardboard armor to make sure it keeps it's shape, but this creates big gaps between parts on the front. This won't be a problem for us, since we will be sculpting details and smoothing out the form later on in the project.


For our most recent build, we started applying fiberglass resin to the chest piece. This is used to strengthen the armor so that we can sculpt on it with bondo body filler. While the chest was curing, we began cutting and assembling the back armor. Adam also started 3D printing the Pulse Rifle, which should be ready to clean up and assemble at the next build day.
Rachel also brought her Xeno costume so we could brainstorm ideas on how to create the next version of that. Kevin, our other Xeno, and Rachel and I decided we will cut the Xeno skull out of cardboard stacks for the rough master, which they will harden and sculpt.


Our next build will see a lot of progress, since we are now at a point where we can have teams of people working on different smaller parts. We will cut out and assemble the leg armor, start bondo sculpting on the chest, and fiberglass and bondo the back. We'll also be working on the Pulse Rifle, and may have some of the other Marine weapons to start 3D printing. Our team of Xenos will work on the cardboard jigsaw puzzle.
See all of our progress photos on Freeside's Facebook page here: https://www.facebook.com/media/set/?set=a.1045223078825003.1073741829.612557732091542&type=1
Be apart of the Atlanta Cosplay Meetup by keeping an eye on Freeside's Meetup calendar, or our Facebook group here: https://www.facebook.com/groups/AtlantaCosplayMeetup/
In November we began discussing an idea about making a group costume - something we could all work on, and eventually wear, together - and how we could make that into a reality. After a lot of debate (and a little help for Rachel who had already made her own Xenomorph costume!) we settled on making a Colonial Marines and Xenos group from the Aliens franchise.
We just recently wrapped up our 3rd group build, so let's recap what we've done so far.
Our first build we focused on planning and various ideas of what we wanted to do and how we wanted to get there. We decided to use Pepakura to laser cut cardboard as the rough master for our Marine's armor, and to 3D print some of the detail parts as well as their various weapons.
Pepakura is a program that takes a 3D object and lays it out into 2D faces. The example I like to use for this is creating a a paper craft cube. You can lay out the 6 faces of a cube on a sheet of paper, cut the lines, score and glue tabs, and at the end you have your cube in the real world.
This concept scales up to infinitely complex objects. Cosplayers have been using Pepakura for over 15 years now to create complex suits of armor and props. What I discovered is that Pepakura can export into a format that Freeside's laser cutter can interpret, which turns hours of cutting material into mere minutes.
For our second build, we began laser cutting parts for the Marine torso, starting with the chest. The parts were exported from Pepakura into the laser cutter's software, which was then cut out of cardboard. By dialing in different settings for "cuts" and "scores", we can complete everything in a single job. After about 20 minutes we had all of the pieces cut out and began assembling!
Assembly consists of using hot glue to glue the seams of the cut together. We glue the edges on the inside of the cardboard armor to make sure it keeps it's shape, but this creates big gaps between parts on the front. This won't be a problem for us, since we will be sculpting details and smoothing out the form later on in the project.
For our most recent build, we started applying fiberglass resin to the chest piece. This is used to strengthen the armor so that we can sculpt on it with bondo body filler. While the chest was curing, we began cutting and assembling the back armor. Adam also started 3D printing the Pulse Rifle, which should be ready to clean up and assemble at the next build day.
Rachel also brought her Xeno costume so we could brainstorm ideas on how to create the next version of that. Kevin, our other Xeno, and Rachel and I decided we will cut the Xeno skull out of cardboard stacks for the rough master, which they will harden and sculpt.
Our next build will see a lot of progress, since we are now at a point where we can have teams of people working on different smaller parts. We will cut out and assemble the leg armor, start bondo sculpting on the chest, and fiberglass and bondo the back. We'll also be working on the Pulse Rifle, and may have some of the other Marine weapons to start 3D printing. Our team of Xenos will work on the cardboard jigsaw puzzle.
See all of our progress photos on Freeside's Facebook page here: https://www.facebook.com/media/set/?set=a.1045223078825003.1073741829.612557732091542&type=1
Be apart of the Atlanta Cosplay Meetup by keeping an eye on Freeside's Meetup calendar, or our Facebook group here: https://www.facebook.com/groups/AtlantaCosplayMeetup/
Comments
Post a Comment